


Now Reading: How to Start Woodworking in India: A Beginner’s Guide to Tools, Timber, and Tips
-
01
How to Start Woodworking in India: A Beginner’s Guide to Tools, Timber, and Tips
How to Start Woodworking in India: A Beginner’s Guide to Tools, Timber, and Tips

Start your woodworking journey in India! This beginner's guide covers affordable tools, local timber choices (like pine & sheesham), and simple first projects. Learn to set up a balcony workshop and create beautiful, functional items with your own hands.
The Forgotten Song of Wood and Hands
Close your eyes and listen. Can you hear it? The rhythmic tap-tap-tap of a hammer in a village lane, the gentle hiss-scrape of a plane smoothing a plank, the sweet scent of fresh-cut teak lingering in a carpenter’s shed. For centuries, India’s relationship with wood wasn’t just about furniture—it was a conversation. It was the artistry of the Badhai or Suthar community, the intricate lattices of Havelis, the sturdy simplicity of a village charpai. Woodworking was in our blood, our stories, and our homes.
Then came the age of “ready-made.” Flat-pack furniture, glossy laminates, and mass-produced decor promised convenience but delivered something hollow: a disconnect from the very materials that shelter us. Our homes filled with things that had no story, no soul, no trace of human touch.
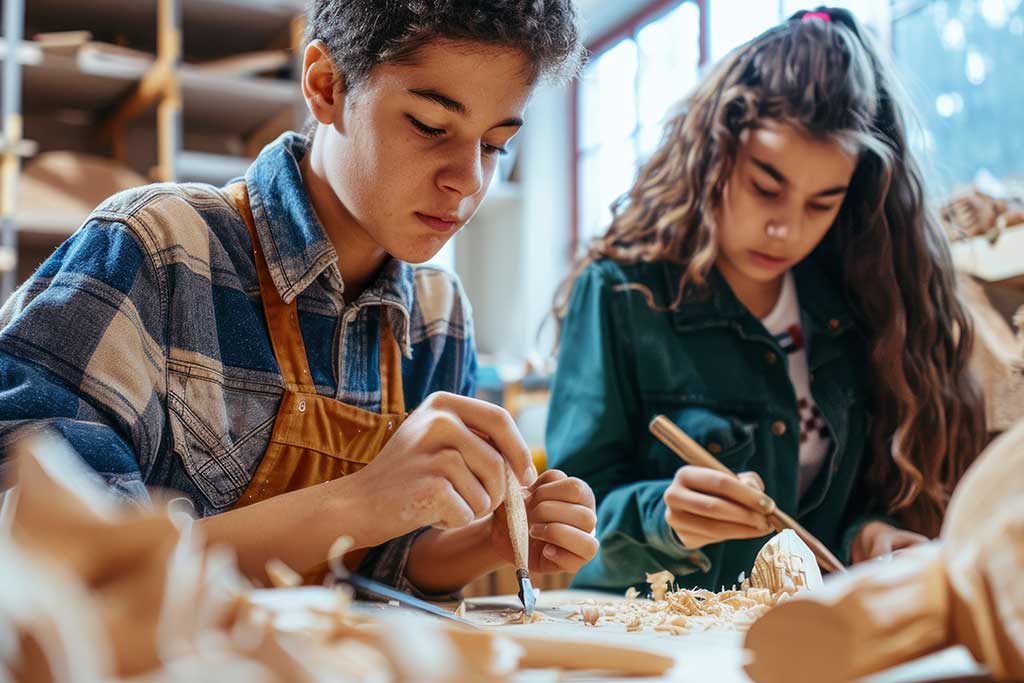
But a quiet revolution is stirring. Across urban balconies and spare rooms in India, a new generation is rediscovering the profound joy of creating with wood. It’s not about becoming a master Vishwakarma overnight. It’s about the simple, grounding pleasure of turning a rough plank into a shelf that holds your books, or a scrap of wood into a gift infused with love.
If you’ve ever looked at a beautiful wooden piece and thought, “I wish I could make that,” this guide is your invitation. Welcome to the beginner’s path of woodworking in India—where we’ll demystify tools, decode timber, and share secrets to start your journey from dreamer to maker.
Chapter 1: The Mindset – Before the First Cut
Dispelling the “Big Workshop” Myth
You don’t need a sprawling shed. In India, where space is precious, woodworking thrives in:
- Apartment Balconies: A 4×4 feet space is enough for small projects.
- Terraces: Perfect for daytime work (with a shade cloth).
- Parking Spots: For those who can work in the evenings.
- A Corner of a Room: With a dust management plan.
The first tool isn’t a chisel—it’s permission. Permission to start small, to make mistakes, to get sawdust in your hair, and to create imperfectly beautiful things.
The Three Pillars of Beginner Success
- Safety First: Respect for tools prevents accidents.
- Project-Based Learning: Don’t just “practice.” Build something simple and useful.
- Community: You’re not alone. India’s DIY community is growing fast.
Chapter 2: The Timber Tale – Navigating India’s Wood Markets
Walking into a timber market (lakdi ki mandi) can be overwhelming. The scents, the stacks, the shouting of rates. Let’s decode it.
Beginner-Friendly Woods in India (From Cheapest to Premium)
1. Pine (Chir/Pine) – The Training Wheels
- Look: Light yellow, straight grain, often with visible knots.
- Why Start Here: It’s soft, easy to cut and sand, and very affordable.
- Cost: ₹40-₹80 per cubic foot.
- Best For: Practice joints, shelves, simple boxes, painting projects.
- Buying Tip: Ask for “planed pine” (chikna kiya hua) to save initial work.
2. MDF & Plywood – The Practical Choice
- Not technically wood, but a wood product every Indian DIYer uses.
- MDF: Smooth, uniform, perfect for painted furniture. Warning: Dust is harmful—wear a mask!
- Commercial Ply: Affordable, strong, but check for empty gaps inside.
- BWR Ply (Boiling Water Resistant): For kitchens and bathrooms.
- Cost: ₹60-₹120 per square foot (for 18mm thickness).
3. Sheesham (Indian Rosewood) – The Desi Darling
- Look: Golden to dark brown, beautiful grain, often wavy.
- Why It’s Great: Hard, durable, and takes polish beautifully. The classic “solid wood” of North India.
- Cost: ₹150-₹300 per cubic foot.
- Best For: Furniture you want to last generations—tables, bed frames, cabinets.
- Buying Tip: Look for “air-dried” wood to minimize warping later.
4. Teak (Sagwan) – The King
- Look: Golden brown, oily feel, straight grain.
- The Legend: Resistant to termites, water, and time. The premium choice.
- Cost: ₹250-₹600+ per cubic foot.
- Beginner Advice: Save it for a special, small project once you have confidence.
5. Reclaimed Wood – The Storyteller
- From old doors, windows, railway sleepers, and demolished houses.
- The Charm: Weathered texture, history, and unique character.
- Where to Find: Demolition sites, kabadiwalas, specialized dealers in cities.
- Caution: May have hidden nails or be very hard—challenge for later.
How to Buy Wood Like a Pro (Even as a Beginner)
- Visit with a Plan: Know your project’s required dimensions.
- The Moisture Check: Tap two pieces together. A clear “clack” means dry; a dull “thud” means damp. Damp wood warps.
- Inspect for Defects: Avoid wood with large cracks (daras), too many loose knots, or bowing.
- Haggle Gently: Timber markets expect negotiation. A polite “Bhaiya, thoda student discount?” can work wonders.
- Transport: Auto-rickshaws or tempo services can deliver small quantities.
Chapter 3: The Essential Toolbox – Building Your Arsenal on a Budget
You don’t need everything. Start with this ₹5,000 – ₹8,000 Starter Kit.
The Measurement & Marking Squad (Your Guides)
- Steel Measuring Tape (5m): ₹150. Get one with clear markings.
- Carpenter’s Pencil & Marker: ₹50. Flat pencils don’t roll away.
- Try Square (Engineer’s Square): ₹300. Ensures perfect 90-degree angles. Crucial!
- Steel Ruler (1 foot): ₹200. For precise marking on wood.
The Cutting Crew (Where Magic Happens)
- Tenon/Back Saw: ₹800-₹1,500. Has a stiff back for straight cuts. Your first real saw.
- Japanese Pull Saw (Ryoba): ₹1,200-₹2,000. Cuts on the pull stroke, giving cleaner, easier cuts for beginners. Highly recommended.
- Coping Saw: ₹400. For cutting curves (like jigsaw puzzles).
- Stanley Knife/Utility Knife: ₹200. For marking and small trims.
The Shaping & Joining Team
- Claw Hammer (450g): ₹500. For driving and pulling nails.
- Set of Screwdrivers (Flat & Phillips): ₹300.
- Adjustable Spanner (Crescent Wrench): ₹250.
- Block Plane: ₹1,000-₹2,000. To shave wood smooth and adjust fits. A game-changer.
- Chisel Set (4 pieces: 1/4″, 1/2″, 3/4″, 1″): ₹1,500. Get ones that feel solid.
- Mallet (Wooden or Rubber): ₹400. To hit chisels without damaging them.
The Fastening & Finishing Troop
- Hand Drill (or a basic Corded Power Drill): ₹1,500-₹3,000. Your first power tool. A hand drill costs ₹800 but requires effort.
- Drill Bit Set: ₹500.
- Sandpaper Assortment (80, 120, 220, 400 grit): ₹200.
- Wood Glue (Fevicol SR): ₹150. The unsung hero of strong joints.
Where to Buy Tools in India:
- Local Hardware Shops (Hardware Kirana): For basics, immediate need, and advice.
- CP Tools, Premium Tools, Tejani Tools: Reliable branded stores in major cities.
- Online: Amazon, Industrybuying. Read reviews carefully.
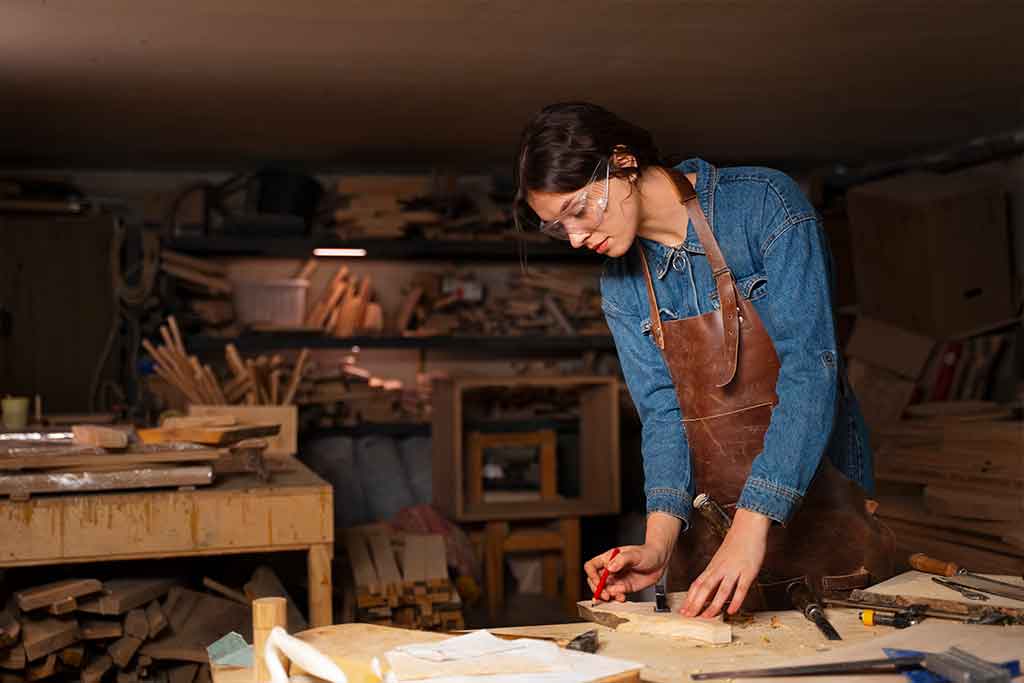
Chapter 4: The Sacred Space – Setting Up Your “Shala” (Workshop)
The Balcony Workshop Blueprint
- The Work Surface: A solid, heavy plywood sheet (2ft x 4ft) placed on two sturdy stools or a folding table.
- Dust Management: A simple broom and dustpan. Always wear a mask when sanding.
- Storage: Use wall hooks, a tall tool organizer (like for gardening tools), or a large plastic box with a lid.
- Lighting: A bright, adjustable LED lamp for evening work.
- Sound Etiquette: Avoid power tools during early mornings, afternoons, and late nights. Be a considerate neighbor.
Safety is Your First Project
- Eyes: Safety glasses (₹300). Sawdust and flying chips are real.
- Lungs: N95 Dust Mask (₹50/piece). Non-negotiable.
- Ears: Basic earplugs (₹100) if using loud machines later.
- Mind: Never rush. Never work when tired or frustrated.
Chapter 5: Your First Projects – The Confidence Builders
Start here. Success in these builds the skill and courage for bigger things.
Project 1: The Simple Sanded Serving Board (Weekend 1)
- Goal: Learn to cut, sand, and finish.
- Material: A 1-foot piece of pine or sheesham plank (2″ thick).
- Skills: Measuring, sawing, aggressive sanding, applying oil.
- Process: Cut rectangle → Round corners with sandpaper → Sand from 80 grit to 400 grit until silky → Apply coconut oil or food-safe linseed oil.
- Victory: You made something beautiful and usable!
Project 2: The Book Rest / Laptop Stand (Weekend 2)
- Goal: Learn basic joinery and angles.
- Material: Pine or plywood.
- Skills: Cutting angles (using your try square), drilling pilot holes, screwing pieces together.
- Process: Cut two identical side pieces (like triangles with a flat top) and one shelf piece → Sand all → Attach shelf between sides with screws and glue.
- Victory: You made functional joinery!
Project 3: The Wall-Mounted Spice Shelf (Weekend 3-4)
- Goal: Learn project planning and assembly.
- Material: Plywood or pine planks, metal L-brackets.
- Skills: Planning a cut list, ensuring level mounting, finishing for kitchen use.
- Process: Design a simple 2-tier shelf → Cut all pieces → Sand → Assemble with brackets and glue → Paint or varnish → Mount on wall.
- Victory: You built custom furniture for your home!
Chapter 6: The Joinery Journey – How Pieces Become One
Nails and screws are fine, but joinery is the soul of woodworking.
Beginner-Friendly Joints to Master:
- Butt Joint: Simplest. Two ends glued and screwed together. Strengthen with a wooden block (corner block) inside.
- Dowelled Joint: A step up. Holes are drilled, and wooden dowels (gullies) with glue join the pieces. Makes alignment clean.
- Half-Lap Joint: Each piece gets half its thickness cut away so they lock together flush. Great for frames. Your chisel and saw skills will grow here.
The Golden Rule of Joinery: Measure Twice, Cut Once. Mark your cuts clearly. A sharp pencil line is your contract with the wood.
Chapter 7: The Finish Line – From Raw Wood to Radiance
The finish protects your work and makes the grain sing.
Beginner Finishes Available in India:
- Danish Oil / Teak Oil: The Best Beginner Finish. Wipe on, wipe off. Enhances grain, offers decent protection. Easy to reapply.
- Polyurethane Varnish (Clear): Tough, protective coat. Can be brushed on. Practice on scrap to avoid brush marks.
- Wood Stain: Changes color. Always test on scrap first! Sheesham with a dark walnut stain is stunning.
- Milk Paint / Chalk Paint: For a painted, rustic look. Hides imperfections beautifully.
- The Traditional Lac (Shellac): The ancient art. For later, when you want to connect with true Indian craftsmanship.
Sanding Secret: The quality of your finish is 90% determined by your sanding. Progress patiently through the grits. When you think you’re done sanding, sand some more.
Chapter 8: Learning Resources – The Guru is Online
You have a world of teachers in your pocket.
- YouTube (The Free University):
- For Indians: Search “DIY woodworking India,” “Carpentry basics Hindi.”
- International (with great visuals): Steve Ramsey’s “Woodworking for Mere Mortals” (perfect for beginners), Paul Sellers (hand-tool master).
- Books: “The Complete Manual of Woodworking” is a classic reference.
- Community: Join Facebook groups like “Indian Woodworking Enthusiasts” or “DIY India.” Post your work, ask questions, get inspired.
Chapter 9: Overcoming the Indian DIY Challenges
- “Logistics Nahin Hai” (Space/Noise): Work in short, focused bursts. Use hand tools more—they’re quieter and more meditative.
- “Galti Ho Gayi” (Mistakes): There are no mistakes, only “design changes.” Wood filler (mastee) and creative solutions are your friends.
- “Time Nahi Mila” (Motivation): Dedicate a fixed 2-hour slot every weekend. Protect it like an important meeting.
- “Paise Zyada Lag Gaye” (Budget Blowout): Start with one project and the exact materials for it. Don’t stockpile wood and tools prematurely.
Chapter 10: The Woodworker’s Heart – Beyond the Project
Soon, you’ll notice changes. You’ll start seeing not just furniture, but joints and grains. You’ll feel the difference between teak and pine by their scent and weight. You’ll find calm in the rhythm of sanding. The sawdust on your clothes will become a badge of honor.
You are not just building a shelf. You are:
- Building patience in an impatient world.
- Building sustainability by creating things that last.
- Building a connection to India’s rich artisanal legacy.
- Building confidence in your own two hands.
The first cut is the deepest—not in the wood, but in your self-doubt. Pick up that saw. Buy that piece of pine. Make that wobbly, wonderful first thing. The community of trees and makers welcomes you.
Your journey from timber to treasure starts now.
Previous Post
Next Post


Advertisement

Advertisement